Canadian Smocks Pattern Tips for Clothes and Pillow Covers !
Now that you’ve discovered the Canadian Smocks Guide, I’m pretty sure you want to learn how to apply it to your new projects ! How do you use Canadian Smocks on Clothes and Pillow Covers ? And how do you adapt your patterns to integrate smocks ? In this article, we’ll go through the 2 mains ways of adding smocks to a garment, or to any object made of textiles !
Don’t know what Canadian Smocks are ? Read this guide to become a pro at it, and come back to this article to apply your smocks on a garment !
To choose one of the 2 main ways to sew Canadian Smocks on garments, you need to decide if the smock will be just one for a small part of your design, or if it will be on the entire garment !
Let’s start by the easiest way to add smocks, when it’s only a section of your final design.
Add a smocked section to a garment

This technique is super easy and quick to make. It’s great if you need to add smocks only on one part of your garment or object : a cut out, a sleeve, a yoke, etc. The only bad thing is that the edges of the smocked piece might be quite difficult to sew while still looking perfectly in place. So I found that the edges of the smocked section are not always up to my standards.
But it’s so easy to make, definitely give it a try ! Let’s see step by step how to add smocks on garments :
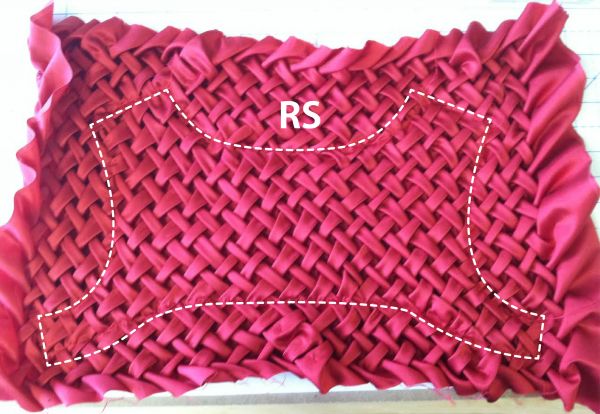
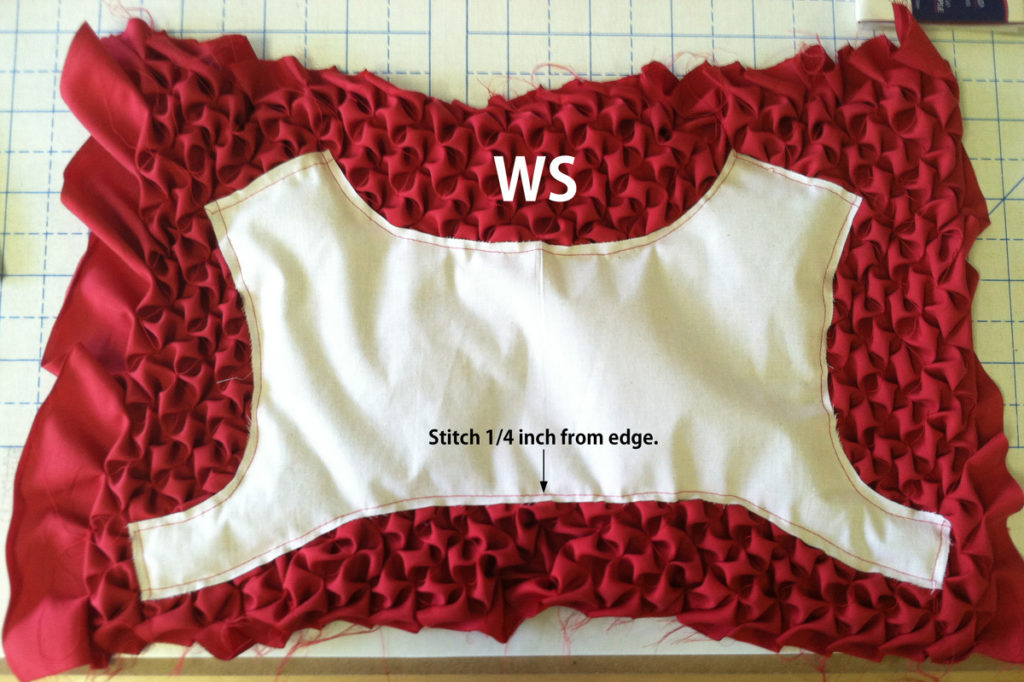
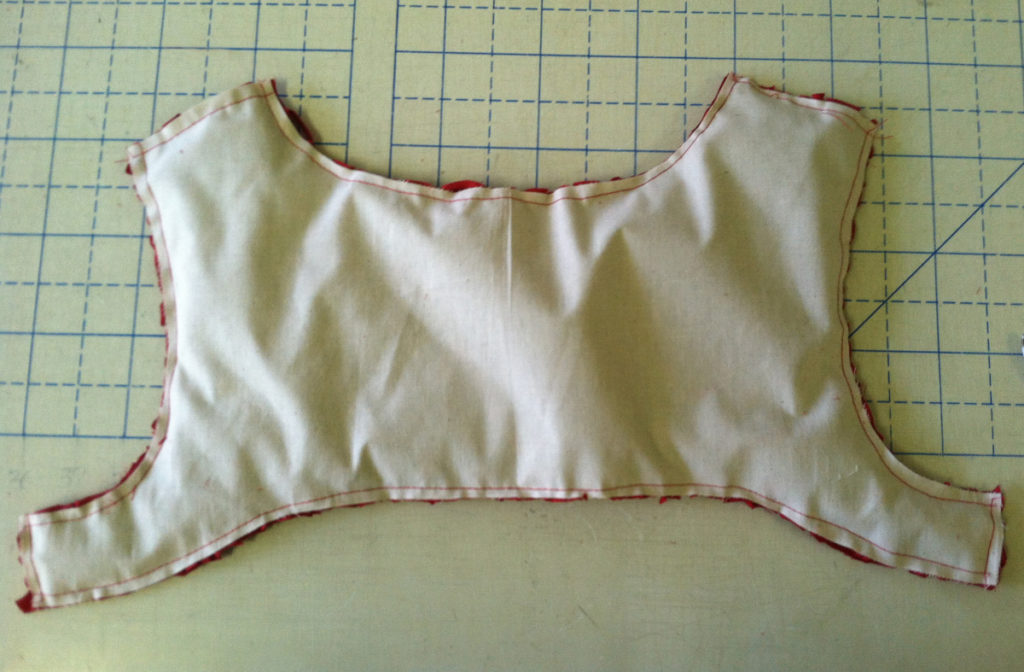
Photo : Scott Phillips via Threads Magazine
- Trace your entire pattern on paper, including the part you want to have smocks on. This part should be separated from the rest. For example, if you want the upper part of the bodice to be smocked, separate the smocked front from the regular front.
- Cut every pieces of the pattern in the final fabric, even the part that will have smocks
- Using another piece of fabric, smock a big surface, usually at least twice as big as the final surface you need [See the next section to get the shrinking ratio of your pattern]
- Place your smocked cloth on the back side
- Place the piece of fabric you cut earlier on top of your smocks [the one that represent where the smocks are going to be]
- Stitch the fabric on the smocked cloth, the closest from the end of the sewing allowing possible. For example, if your seam allowance is 10mm, try sewing at 3mm from the edge, to make next seams easier.
- Cut the edges of the smocked cloth to match the other fabric
- Finish sewing all the parts of your garment
I learned this great technique on this tutorial from Threads Magazine.
This technique is the easiest, because you don’t need to calculate anything with the smocks. You only need to make a smocked cloth big enough to fit your pattern.
But this gives you sometimes weird finishes.
So let’s see the other way to add smocks to a garment !
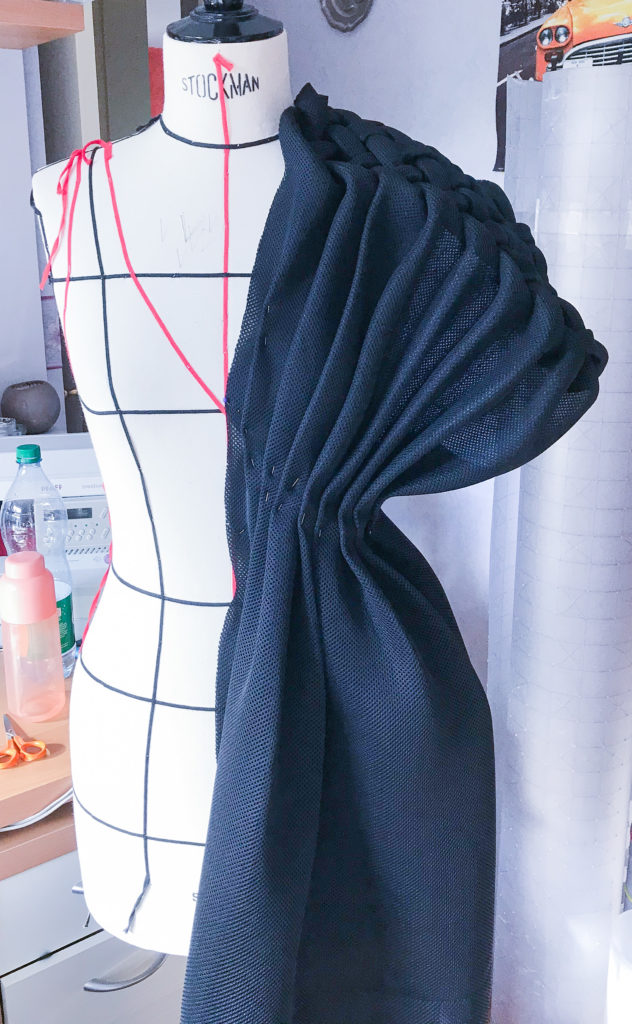
Smocks on the entire garment
Draping
Smocks is all about creating volume on fabric. But sewing 2 fabrics together crushes the volume. So what I find more interesting when working with Canadian Smocks, and other types of fabric manipulations, is to drape the smocked cloth on a mannequin, making a voluminous shape with the least amount of stitches possible. [I did a live video on my Facebook Group, in case you want to see it, it’s free to join ! Send your request and once you’re in, go to the “Live” section on the left !]
Draping is a great way to find new clothing shapes, and while there is plenty to do if you “just” work with regular fabric, there are so many more possibilities if you work with a manipulated fabric ! It will have a different shape, and usually create more volume than regular fabrics. So when I drape fabrics, I try to follow the fabric’s own direction and shape, more than trying to impose my own vision. Not putting a lot of seams allow the fabric to keep its own properties.
When draping, you always reverse engineer your paper pattern. You start by playing with the fabric on the mannequin, and when you are happy with the result, you trace the important lines on the fabric (front, back, grain, waist, hips, side, etc), and report it on the paper. I love this way of creating garment with Canadian Smocks and fabric manipulations, because there is no crazy maths to do !
Pattern Making
In this way, the smock is present on the entire garment, just like on this coat. When the shape is not too complicated, you can start with a regular, 2D paper pattern.

To create the pattern for this coat, I started by finding my shrinking ratio. Since Canadian Smocks are a technique that gather fabric together, the end size of the surface will be smaller than the original size of the fabric. The shrinking proportion depends on the pattern. For the Flower pattern, that proportion is 2 : if I take a 50x50cm fabric, then I smock it, I will end up with a 25x25cm smocked fabric.
What’s your shrinking ratio ?
To learn what the shrinking ratio is for your pattern ;
- Cut a piece of fabric at the size of your choice, at least 20x20cm.
- Note/Measure the size before smocking.
- Smock your piece of fabric.
- Measure your sample again.
- Divide one measurement by the other, and you’ll get your shrinking ratio !
You can now start building your paper pattern, exactly the way you need your final garment to look like. There are a few extra steps to adjust your pattern to smocks, so please bare with me !
Once you have your “regular” paper pattern, you’ll need to :
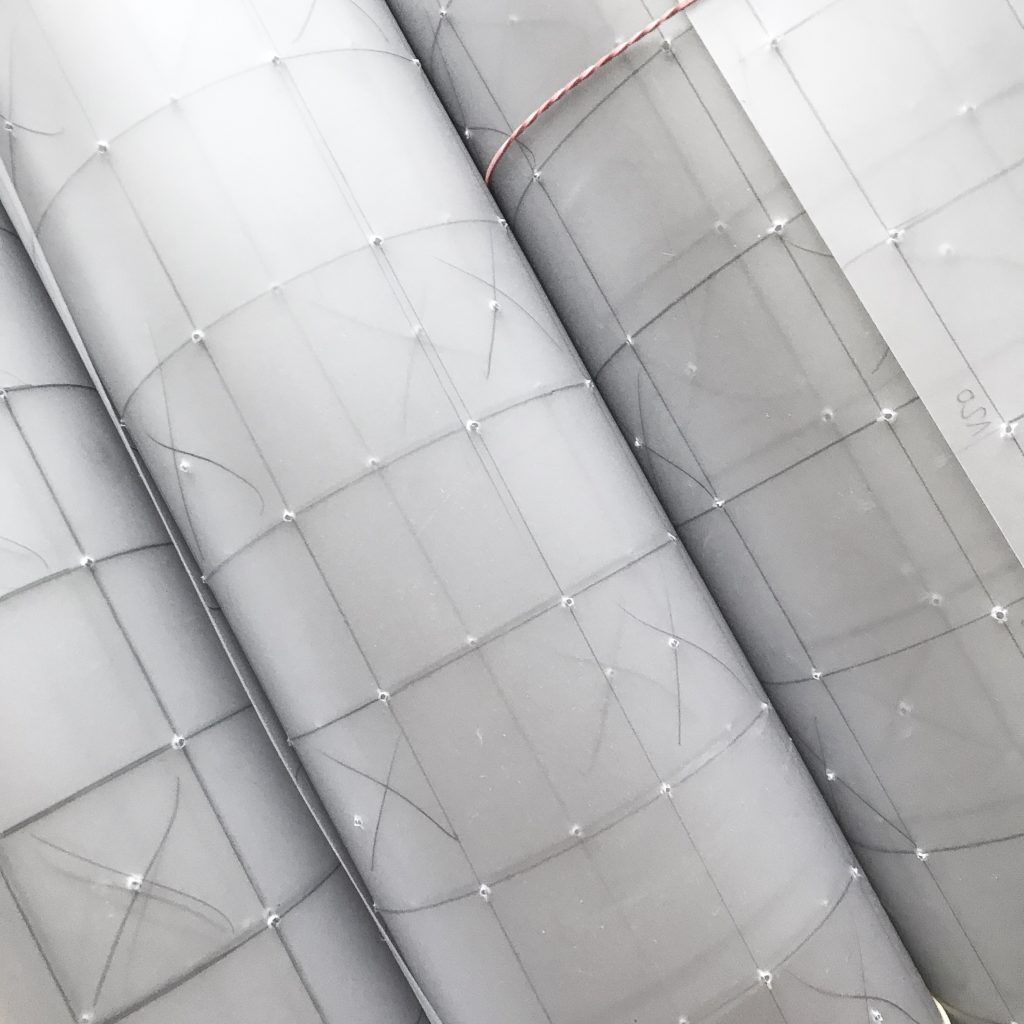
- Enlarge it by your shrinking ratio : your final size * your shrinking ratio = the size of your final pattern. If it was 2 (or 50%), your pattern need to be twice as big, so multiply EVERY measurement by 2, and draw your new pattern ! It’s easier to use another piece of paper. This is what I did with my Neosmock collection at Flo Home Delight, my patterns are twice as big ! My cushions are 40x40cm, so my patterns are 80x80cm (+seam allowance)
- Now you can draw your smock pattern, directly on this enlarged pattern. Be mindful of where you start to draw your pattern, as it will change the end design. You might want to do some test before to check the placement !
- You might see that with curved lines (like A LOT of the lines on a clothing pattern) will go right in the middle of your smocked pattern. When a smock pattern is not completely inside the pattern, you won’t be able to smock it.
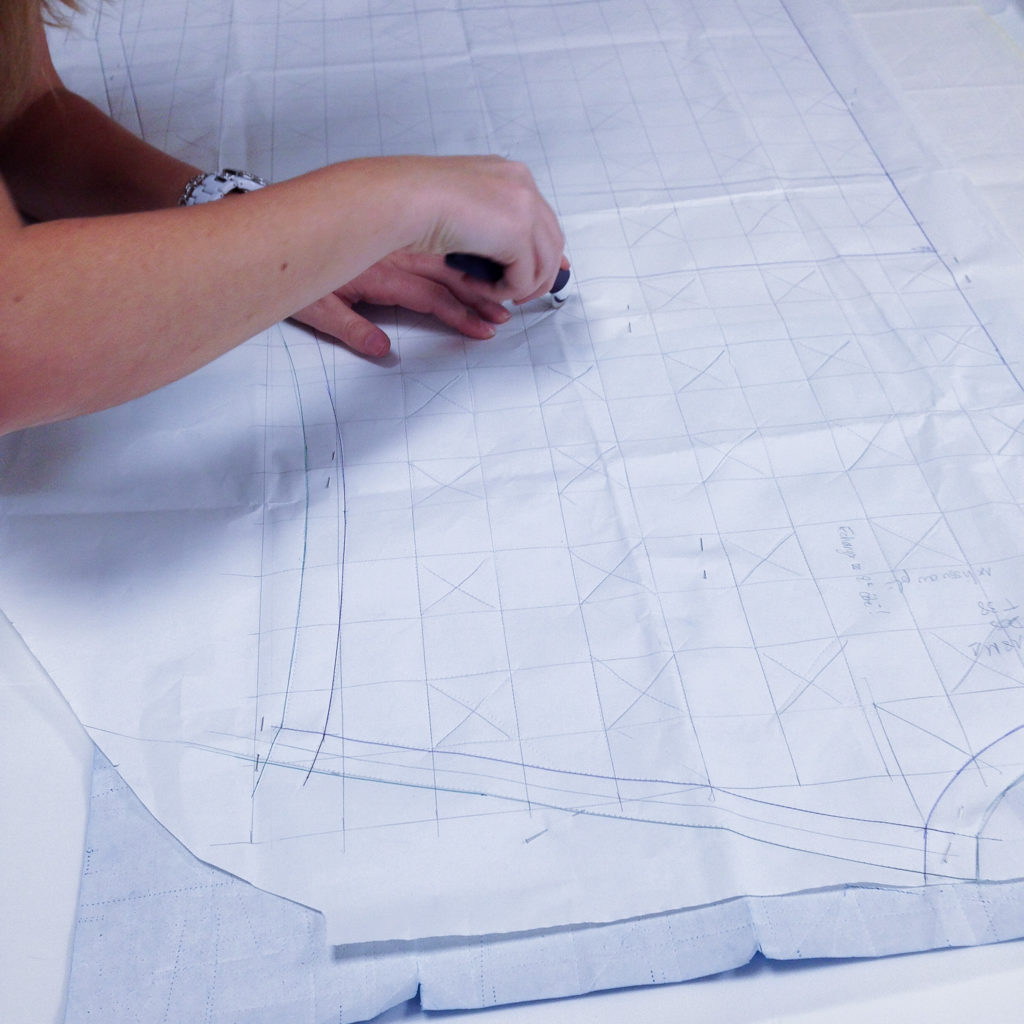
- Cut the fabric following the pattern, and mark the smock pattern on the fabric as well. To do that, I make holes on my pattern using an awl, and then mark the fabric with a heat erasing pen. See the cushion pattern up here 👆🏻. You can also mark the seam allowance emplacement everywhere, because it can get confusing once everything is smocked.
- Start smocking !
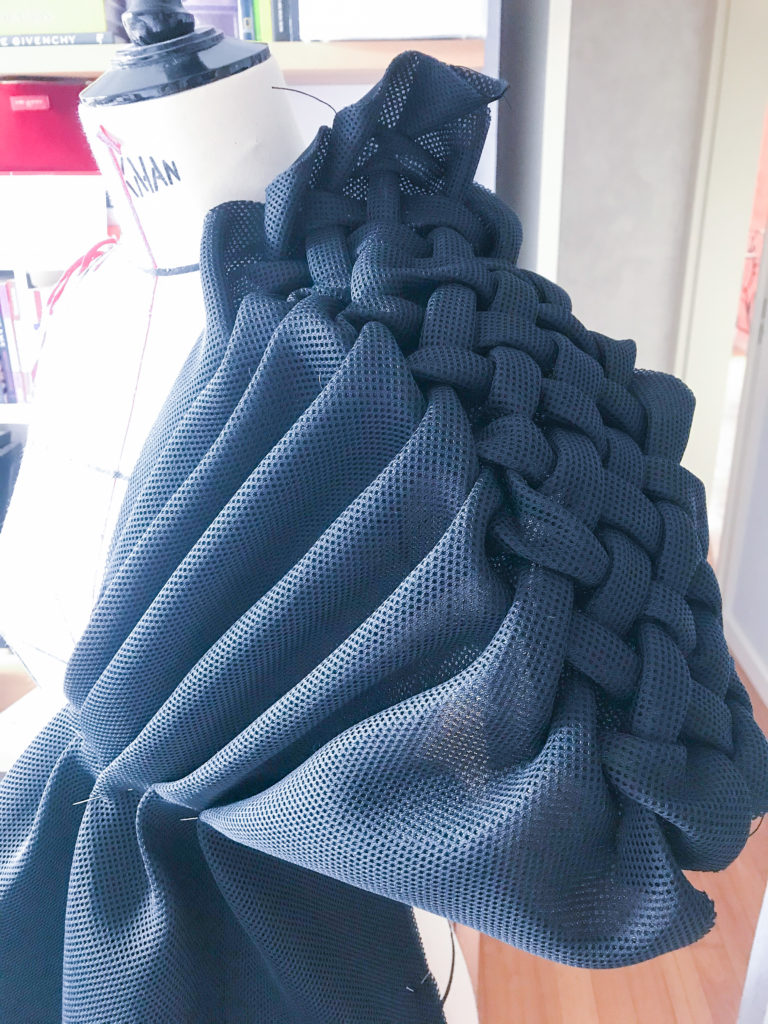
- Now the tricky part : sewing all these amazing smocked pieces together, and get nice finishings. To do that, I had to make A LOT of sewing and seam tests, and I learned how to handle the fabric best to get the result I want. Check the picture below to see how I do it, but note that it only works for this specific flower pattern ! If you’re using another pattern, I advise you to make some small test to learn how to stitch your pieces together and get a nice result. So once my piece is smocked, I pin the seam allowance like on picture.
- Then I baste in place, each pieces separately. This ensure that the fabric stays exactly how I want it during assembling, and therefore more beautiful seams.
- Now you’re finally ready to stitch your pieces together !

Did you make it through ? I know it’s quite complicated, but that’s how I achieve a really nice finishing. But please, if you sew your smocked garment in an easier and faster way, share with me ! 😃
Some extra tips here :
- Straight seams are WAY easier to do, and especially if you only have smocks on one side, like I did on my smocked pillow cover for Flo Home Delight. So you can always start by easier pieces, like cushions, to start learning, before going for a whole garment. [I’ll admit, I HAVE cried because smocking felt too complicated and I was alone trying to figure this out 😅]
- When you’re ready to make clothes, AKA level up to where everything is curved, I advise you to always have a lining on your garment, to control the edges and finishings of your garment. On this coat, because it was my first clothing using smocks, I didn’t have one, and I find the result a bit muddled, not refined the way I like it. photo détail manteau smock ?
- If you have access to digital tracing software for pattern making (like Lectra), PLEASE USE IT. It was quite a headache and took so long to trace the enlarged pattern, I wish I had access to that.
- If you have access to a big size printer, you can also print your smocked pattern in bulk, and then trace your garment pattern on top. Way faster !

Are you ready to add Canadian Smocks to your clothes ?
I introduced you to 3 techniques :
- Adding a smocked section
- Using draping to make the pattern
- Using pattern making to make an entire garment with smocks
Which ones seems to suit best your design idea ? Comment below !
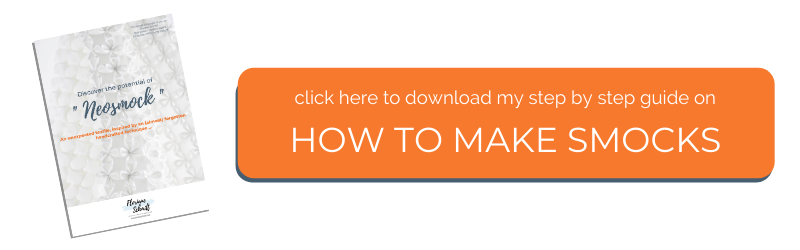
Do you want to get behind the scene, and learn exactly how I made my Neosmock collection ? Click to download this free ebook where I show exactly how to smock, how to create the pattern for the cushions, and all my tips to do it faster !

Floriane Schmitt is a textile designer, sharing her knowledge about textiles + creativity. She graduated with honors at a Parisian fashion school in Fashion Design & Fashion Business, and started her career with Flo Home Delight, her creative textile studio. Discover her collections on www.flohomedelight.com. She is also teaching creative souls how to become better designers, using textile as a main medium.


2 Comments
Frankie
Your work is very lovely. I bought a round smocked cushion and some of the smocking has come undone. Any suggestions on how I can fix it without taking it apart?
Floriane Schmitt
Hello Frankie ! Thank you ! Well usually it’s worked from the inside but if you don’t want to take it apart i found a technique that works from the right side.
For this to work you need to understand how to stitch regular smock pattern ; going in the fabric with the needle then 2mm further out again.
I would find where the stitch came undone ; there are usually small holes in the fabric, or the thread still attached, then use needle & thread to remake the stitch. It’s quite hard to explain with text but basically it’s remplacing the stitch from the outside !